Thursday, November 18, 2010

A Mid-week Chuckle... I'm glad I didn't live in 1955!

A friend of mine at work photo copied this out of an old magazine, and not only did I get a good laugh out if it, but wow... look how far we've come! I'm so glad I didn't live in 1955!

My favorite quote: "Let him talk first - remember, his topics of conversation are more important than yours." LOL!

Tuesday, November 16, 2010

Curried Carrot and Red Lentil Soup


It's soup season! First up... Curried Carrot and Red Lentil Soup!

I had a version of this at a restaurant the other day, and fiddled around with making my own recipe... and it turned out great!

Curried Carrot and Red Lentil Soup

2 Tbsp unsalted butter
1 tsp olive oil
1 medium onion, peeled and finely minced
2 cloves garlic, minced
2 tsp. Madras curry powder (or use regular curry powder, just not "red" curry powder)
1 tsp. ground cumin
1 lg. leek, white and light green parts, washed well and diced
5 medium carrots, peeled and diced
1c. dried red lentils
6-8c. chicken stock
salt and freshly ground black pepper
1/2 creme fraiche or sour cream
Pinch of cayenne pepper

garnish:

cilantro leaves
sour cream

In a heavy 3 quart casserole, melt the butter together with the oil over low heat. Add the onion and leeks and cook, stirring often, for 3-4 minutes or until the onion is soft but not browned. Add the garlic, curry and cumin and blend well into the onion mixture. Add the carrots, lentils, and 6 cups of stock or bouillon and season with salt and pepper. Bring to a boil, reduce the heat and simmer the soup, covered, for 1 hour to 1 hour and 15 minutes, or until the lentils are very tender. If the soup gets too thick, add some of the remaining stock.

Whisk in the creme fraiche or sour cream. Taste the soup and correct the seasonings, adding a pinch of cayenne. Serve the soup in individual bowls, accompanied by crusty French bread and garnished with cilantro leaves. Serve a bowl of sour cream on the side. Serves 6.

Monday, October 25, 2010

Tomato Basil Soup and Grilled Cheese


What could be better on a cool cloudy day than tomato soup and a grilled cheese sandwich? Homemade tomato basil soup and Alton Brown's idea of a perfect grilled cheese sandwich of course!

The soup recipe is mine, the sandwich I have to credit to AB. What a delicious combo!

The soup is super easy to make, and uses canned tomatoes so can be made year-round! Splurge and get the more expensive Italian brand of tomatoes, either with or without basil added is fine. The way I see it, if the tomatoes are your main ingredient, you might as well use good ones!

Easy and Delicious Tomato Basil Soup

Ingredients -

1-2 Tbsp olive oil
1 medium to large sweet (vidalia if you can get it) onion, chopped
1 clove garlic, minced
1 small shallot, chopped fine (optional)
1 large can crushed tomatoes
1 box chicken broth
1 small bunch fresh basil, leaves picked from stems, half the leaves left whole and half cut into a chiffonade (reserve a few sprigs of baby basil leaves for a garnish if you care about that sort of thing)
1/2c. heavy (whipping) cream
salt and pepper to taste.

Directions:

Heat the oil in a large saucepan or small soup pot. Saute the onions and shallots about 5 minutes over medium heat, then add in the garlic and continue sauteing approximately 5 more minutes, or until the onion is translucent and soft. Add in the can of tomatoes chicken broth, and whole basil leaves, and bring to a simmer. Simmer approximately 20 minutes. Carefully transfer to a blender in small batches (remove the small center cap of your lid so you don't build up pressure with the hot liquid and burn yourself when it squirts out... hold a kitchen towel loosely over the hole in the lid to avoid any splash when you turn the blender on) OR use a hand-held immersion blender in the pot, and puree the soup until smooth. At this stage you may choose to run the soup through a medium-mesh strainer to remove the tomato seeds (which can be unpleasantly tough when cooked) and stringy bits of basil, or you can just leave it the way it is if you don't mind a few tomato seeds and onion bits. Return soup to low heat heat and add in the basil chiffonade and cream. Season to taste with salt and pepper. (DO NOT BOIL after you put in the cream... the cream will curdle, yuck!)

For a lighter, healthier version, the cream may be omitted.

Alton Brown's version of The Perfect Grilled Cheese

Ingredients:

Crusty peasant bread, 1/2 inch thick slices
shredded sharp cheddar
Dijon mustard
freshly cracked black pepper
olive oil

Directions:

Spread one slice of bread with Dijon mustard and top the mustard with a healthy dose of freshly cracked black pepper. Pile on a small handful of shredded sharp cheddar, top with the remaining slice, and spritz or brush the outsides of your sandwich with olive oil.

At this point AB recommends using two heated cast-iron skillets placed on an oven-mitt on the counter, with the sandwich in one skillet and the other skillet sitting on top of the sandwich to weigh it down, in lieu of using a unitasker panini press (we all know how much AB hates unitaskers). If you own a panini press, by all means use it. If you do not own a panini press, be aware you can make beautifully perfect paninis in a waffle iron or a George Foreman Grill I've never tried the waffle iron, but I saw someone do it on Diners, Drive-ins and Dives... but I DO use my George to make paninis ALL THE TIME. They turn out beautifully, and there's no reason to use anything else in my opinion!

Sunday, October 17, 2010

How to Make the Perfect Omelette: 8 Easy Steps


This morning, for the first time ever, I finally made what I would consider a perfect omelette. Did you know, if the egg in your omelette has browned you've done it wrong? After much research, and quite a few trials and fails, here it is, laid out for you in one quick and easy post:

How to Make the Perfect Omelette:

Ingredients you will need:

2 eggs per omelette
1 Tbsp. milk per omelette
dash of salt and dash of pepper
any filling for the omelette, veggies sauteed and meat browned and drained in advance in a separate skillet. Cheese shredded and waiting on standby.

Equipment you will need:

metal or glass mixing bowl
1 Tbsp. measuring spoon
wire whisk
12" nonstick skillet with sloped sides, and a lid that fits
1 silicone spatula
a second skillet if you plan on adding meat or veggies to your omelette, to saute them before adding to the omelette.

1. Place a 12" nonstick skillet with sloped sides over very low heat. We're talking one notch over the lowest setting you can get. Our knobs have numbers, I had it set on 2.

2. If you are adding any meat or veggies to your omelette, cook them in a separate skillet first. I used precooked ham, so I diced up the ham with the red pepper and onion and threw it all into the skillet with a little oil and a dash of salt over medium heat just until the onions and peppers start to soften but still have a little crunch to them. You don't want mush, and you don't want them to brown. If you are using bacon or sausage, saute any vegetables first in a little oil, remove veggies to a bowl, and cook the meat by itself in the same pan. Be sure to drain the meat on paper towels before adding to an omelette. For two Denver Omelettes, I used 1oz diced thickly sliced pre-cooked ham, 1/2 of a red bell pepper diced, and 1/4 of a red onion diced.

3. Crack two eggs into your medium to large mixing bowl, add 1 Tbsp. milk, a dash of salt and a dash of pepper. I know what you're thinking... 2 eggs? I've got a big appetite, I like 3 or 4 (or more) eggs! If you want more than 2 eggs, then make more than one omelette. Trust me on this. 2 eggs per omelette, no more, no less.

4. Add 1Tbsp. butter to your skillet over low heat, and once it melts, swirl the butter around the pan, coating the bottom and about 1/4 inch up the sides.

5. Whisk the eggs for 2 minutes, immediately before adding to the pan. Whisking incorporates air into your eggs, which makes them nice and light and fluffy. This must be done by hand with a wire whisk. Don't try to use a mixer to whisk these eggs, unless you want a tough, chewy omelette. Electric mixers have too much power and whisk too quickly, and can break the proteins instead of incorporating air into your eggs. If your arm wimps out after a minute, whisk it for a minute, set it down, then come back to it and whisk it for about one and a half minutes longer.

6. Immediately following the 2 minutes of whisking, pour the eggs straight into the pan and cover with the lid. Don't swirl them around, don't scootch them around with the spatula, just let them sit and steam for a couple minutes.

7. Check the eggs after about 2 minutes or so. You should still see a bit of uncooked egg on top, but when you tilt the pan the entire egg mass should slide as one, without any liquid threatening to run off the top of your omelette. If it still looks too runny, cover it with the lid for a minute or two longer. Don't rush it, don't turn up the heat. Once you've accomplished this state of semi-solidity, add the filling to one side of your omelette and top with whatever cheese you like. Replace the lid and continue to steam over low heat until the cheese looks almost melted.

8. When the cheese looks almost melted, remove the lid, slide the rubber spatula under the empty side of your omelette, and gently and carefully fold it over in half. Look at the color of the outside of your omelette... if it's a beautiful, creamy, pale yellow, you've done it right! If the egg appears to have browned at all... you've cooked the poor thing over too high heat, or cooked it too long. Better luck next time! Slide the omelette out onto a plate, and enjoy!


Boo is still waiting for her omelette. :)

The Elusive Enchiladas


I've put off posting this because of the amount of work involved and the subjective nature of the recipe: there are just some things in this recipe that you have to eyeball, they don't really have measurements.

I've decided to split this recipe into 3 parts: The Sauce, The Filling, and The Assembly. The ingredients for all 3 portions of the recipe will likewise be divided.

This recipe makes approximately 3 dozen enchiladas. Why so many? Because I freeze them individually and store them in gallon ziplocks. They reheat beautifully in the microwave for a fast and easy weeknight dinner, or you can grab a couple to toss in your lunch for work. Feel free to tinker with the amounts if you want to make fewer.

IMPORTANT NOTE: These enchiladas do not require further cooking after assembly, aside from a brief shot in the microwave to melt the cheese. You may serve them immediately with extra sauce spooned over the top, or freeze them as per instructions in this post.

Ingredients:

The Sauce

(These measurements are approximate, a lot is dependent upon how it looks and tastes)

1/2 c. vegetable shortening (weigh this on a scale before adding to the pan)
an equal weight of unbleached white all-purpose flour
3 each of dried pasilla and guajillo chile peppers, or you can just use chili powder
approximately 4c. hot tap water.
salt to taste

The Filling

2lb ground beef
4-5 small cans chopped green chilies, drained in a strainer
2-3 cans (I think I used 3) of black beans, rinsed and drained
2 envelopes dry onion soup mix (I used Lipton Onion Soup Mix, one box contains 2 envelopes)
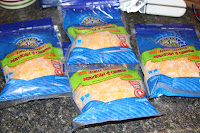
8c. Mexican 4 cheese blend (can find at most groceries, usually a blend of monterey jack, cheddar, queso quesadilla and asadero) or whatever kind of cheese you want.

The Assembly

3 dozen flour tortillas (the size that come 12 to a bag, approximately 28oz per bag)
2-3 sheet pans covered with foil
a soup spoon
an extra pair of helping hands

Directions

The Sauce:


Melt the shortening and flour together in a medium saucepan over medium heat until it starts to bubble and turns a very light blonde color (this is called a blonde roux, look what you just learned how to make!). While this roux comes together, toss your dried chiles (if using) into a dry skillet over medium heat and heat them, turning frequently, just until you can smell them (this helps release some of the oils and flavors). When the chiles are heated through, remove them to a cutting board, pull out (or cut out) the stems, shake out the seeds, and toss them in the blender with about 1/2 cup of hot water, scraping down the sides to make a chile puree. Add approximately 4c. hot water to the roux, whisking with a wire whisk to combine. Add in the chile puree, and add some salt until it tastes right. The sauce should be a dark rusty enchilada sauce color, and be thick like gravy. If it's not dark enough, feel free to add chili powder until it's the right color, and if it's too thin and watery, you can mix some more flour and a little water with a fork in a small bowl to make a slurry, and dribble this in to thicken it more. A lot of this sauce is testing by color and taste... you want to keep adding chiles and chili powder until it's the right color, salt until it's the right flavor, and flour and water mixture until it's the right thickness.

Note: don't make it too thick, think chicken gravy, not a thick brown or cream gravy. You don't want it to be gloppy. If you choose not to use dried chiles, you can use all chili powder... just make sure to keep adding until your sauce is the right color. If you accidentally make the sauce too thick don't despair... add water and voila, it thins out again!

Additional Note: As with any gravy, it will not reach it's maximum thickness until it boils. When the sauce boils, the flour releases all of it's gluten, and the sauce becomes as thick as it's going to get. Make sure you heat this sauce at least until it starts to bubble, then shut off the heat when you have it just right.

Remove the sauce from heat, and set aside to cool slightly once it's the way you want it. If it seems to become thicker as it cools, add a bit more water before you assemble your enchiladas.

The Filling


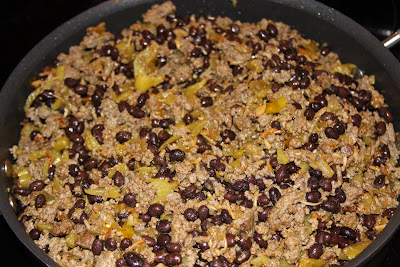
Brown the hamburger in a large skillet over medium heat, breaking up the chunks with either a wooden spoon or my favorite kitchen tool for this task, the 
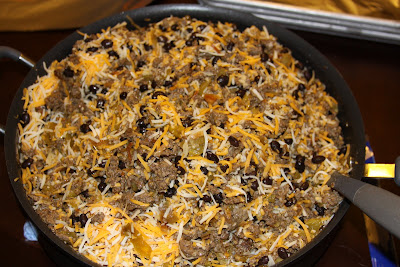
Pampered Chef Mix-n-Chop(I've never before found a tool that chops ground meat so well, you just raise it straight up and down, much like a potato masher and voila! finely chopped ground beef/sausage/chicken etc!). Drain the grease from the meat once it's browned and add in the onion soup mix, drained black beans and green chilies. Allow this mixture to cool before adding the cheese straight into it and stirring it all together (you might want to transfer everything into a great big bowl for this step if your skillet isn't big enough, but I'm telling you mixing the cheese in with the meat/beans mixture makes assembly LOTS easier)


Once everything is cool enough that you won't burn your hands touching it, grab your sauce, filling, and tortillas, and move the entire entourage to the kitchen table or a very large open countertop.

This part of the operation is MUCH easier if you have someone to help you assemble. One person sauces the tortillas, and the other adds the filling, rolls the enchiladas and places them on the sheet pans.


Step 1: Sauce the tortillas.


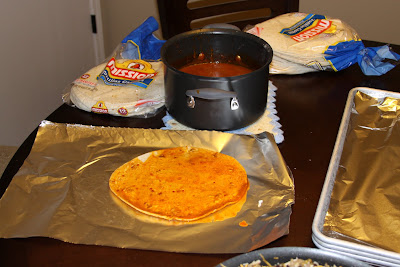
We've tried several methods... dipping them in the sauce (they get so wet they tend to tear and fall apart), painting them with a basting brush (this takes FOREVER and they don't seem to get enough sauce), and saucing them with a soup-spoon much like a pizza crust. The spoon method worked out best. If you're not familiar with this method here's a breakdown:

a. put a piece of foil on the table
b. place a tortilla on the foil.
c. using a soup spoon, spoon one or two spoonfuls of sauce onto the tortilla.
d. using the back of the same spoon, spread the sauce out on the tortilla using a circular motion, starting from the middle of the tortilla and working your way to the edge.
e. flip the tortilla over.
f. repeat saucing technique on the 2nd side of the tortilla.


Step 2: The Filling

Person #2 takes over from here... leaving the tortilla where it lays on the foil, spoon a liberal amount of filling onto the center, spreading it out in a line (I usually use a serving spoon for this, one scoop seems to be plenty. Fold one side of the tortilla over the filling sort of like an omelette, it should be almost folded in half. Then continue rolling the tortilla in the same direction, and place it seam-side down on a foil covered sheet pan. Continue until you run out of tortillas or run out of filling. If you run out of sauce... make more, it's not hard! If you have sauce leftover after assembly, spoon it over each of the individual enchiladas on the pans before throwing in the freezer.

The reason for the foil covered sheet pans is this: If you place the enchiladas on the pans so they are not touching, and if they are on foil, you can put the entire pan in the freezer. Once the enchiladas are frozen, they won't be stuck together, and you can peel each one off the foil and place into ziplock bags for later consumption.

My suggestion for reheating from frozen: Place on plates in the refrigerator and thaw before microwaving. If you choose to microwave straight from frozen that's fine, but I'd suggest heating for 1 minute, cutting them in half, opening them up so the middle can get some heat, and microwaving for 1-2 minutes more... otherwise the cold hard center will need so long to heat through that the ends will get chewy and hard.

Feel free to whip up some more enchilada sauce to serve over these when you reheat them!

Note: I make them 3 dozen at a time because they're so so so delicious... but they're also an awful lot of work, and it's easier to do it once and make a ton, than to do it 3 separate times!

Tuesday, October 12, 2010

Cock-a-Leekie Soup


I finally made Cock-a-Leekie soup... and I hate to say it, but I really didn't like it much. I found it bland and boring and pretty greasy, no matter how much I skimmed off the top. Ah well... I used a recipe I found on the food network site Here. I chose that recipe, as it seemed to have the most in common with the other "traditional" recipes I'd found on the interwebz. Instead of using a whole chicken I used 4 bone-in chicken breast halves and 4 bone-in chicken thighs. Instead of scotch I used brandy, as that's what I had on hand, and neither Jon nor I are scotch drinkers to warrant buying a bottle.

In a nutshell, the result was an oily pot of chicken soup with lots and lots of soggy leeks in it. Ah well, at least it's fall and I can experiment with lots of other soups too! Remind me to make my experimental Mexican chicken soup again so I can take pictures and post the recipe here hehe.

Speaking of which, to remedy the woeful lack of deliciousness in this post, I'll be working in the next day or so to complete my homemade enchiladas post, complete with step-by-step photos! Much tastier!

Friday, October 8, 2010

Classic, Iconic Recipes

I've recently become a little obsessed with classic recipes I've never tasted or cooked. Some are a little intimidating, some are inspiring, some just look plain delicious!

My first thought was Lobster Thermidor. Luckily for me, there's one restaurant here in town where you can order it, so I won't have to assassinate a lobster! I've never cooked a live lobster or crab, and I'm not entirely sure I'd have the stomach for it. Yes yes, I know, someone has to kill it for me to eat it and I know it's a little hypocritical of me to not want to kill the creature but love to eat it, but hey, I don't kill cows either and I loves me some beefs!

Speaking of beefs... my mind then wandered to Beef Wellington. Unfortunately no restaurants in the area that I've found serve Beef Wellington, so I'm going to have to try my hand at making it myself. After several google searches, I finally resigned myself to the fact that the only place I'm gonna find a classic, unaltered recipe for Beef Wellington is from the woman herself: Julia Child. This is definitely going to be a weekend project, as Julia insists that for a Beef Wellington to be good, you must make the dough from scratch. Not only that, but each component to the dish is a complete recipe in and of itself. It's like 4 or 5 recipes all in one. As much as I look forward to the challenge of making this, it's definitely going to stretch my skills. I imagine I'll learn a lot in the process!

Next up (and probably on my home menu for next week): Cock-a-leekie Soup. I always wondered what it was, as the name is intriguing, but I never thought to look it up until recently. So far I've learned that it's a very traditional Scottish dish, and I plan to make it traditionally: Yes, I'm including the prunes!

While I have a few more ideas for classic, iconic recipes (from many different cultures), I'd LOVE some suggestions from you guys. Is there something your family makes that is unique to your culture or background? Some classic French dish that always sounded fancy but you've never tasted or made? Something you've heard a reference to in a movie and wondered what it tasted like (like me and the cock-a-leekie soup lol)? Leave me a comment! I'd love a bunch of suggestions!

P.S. the photos in this post are obviously borrowed as I haven't made or eaten these recipes yet!

Saturday, October 2, 2010

Breakfast Casserole


I love breakfast casserole. I love that it's all-in-one, like an omelette and toast mixed together. I love that you can put it together right before you bake it, or you can also put it together the night before and stick it in the fridge to bake in the morning. I love that it's portable. And I especially love that it's delicious. What I never did love is having to make an entire 9x13 pan of the stuff. It doesn't reheat well as leftovers, and 2-3 people are not going to be able to eat the entire thing in one sitting.

So I did a little experimenting and came up with this recipe that can be made in an 8x8 square pan. I call it a recipe, but really there aren't many measurements. You don't have to be exactly precise when it comes to breakfast casseroles. They're hard to mess up.

Use your imagination when it comes to ingredients: use what you like. I usually use some sort of meat, either 4-6 strips of bacon chopped up, or 1/2lb of some sort of sausage, like a pork or turkey breakfast sausage, chorizo, longaniza, etc. Just make sure you cook and drain and cool the sausage before you add it to the mix. My casseroles usually contain whatever veggie bits and pieces I have leftover in the fridge from the previous week.


A couple ideas: The casserole in the first picture was pork breakfast sausage, mushrooms, onions, broccoli, grape tomatoes, artichoke hearts, and mozzarella cheese. The one in the 2nd picture is longaniza sausage, grape tomatoes, chives, artichoke hearts, mixed bell pepper strips, sliced jalapeno, and cheddar cheese.

Whatever you like in an omelette, put it in the casserole!

Breakfast Casserole

Ingredients:

6 eggs
1c. milk
any fresh herbs you would like to add (chives, basil, thyme, tarragon, oregano, etc)
salt and pepper to taste
3-4 slices crusty day-old bread (I prefer italian or sourdough, but if you use soft sandwich type bread, let it sit out overnight to get crusty. If the slices are thin, add an extra slice or two)
1c. shredded cheese
1/2 lb (or 6 slices) whatever type of meat you prefer, cooked, drained and cooled (if sausage or bacon, brown/fry in a pan, if ham buy cooked deli ham)
about 1c. whatever types of veggies you want to add to the mix, chopped (this is NOT an exact measurement, add as much or as little as you like)

Directions:

Whisk the eggs and milk together in a large bowl and season with salt and pepper. Add any fresh herbs you plan on using. Cut the bread into cubes and add to the bowl. Stir in the shredded cheese, the cooled meat (if using), and all the veggies.

Butter or spray with nonstick spray a 8x8 casserole. Transfer the contents of the bowl to the pan and either cover and refrigerate overnight or pop straight into a 350 degree oven, uncovered, for approximately 20-30 minutes. Start watching the casserole at about the 20 minute mark in case you need to pull it out early, as it is done when the top is starting to brown and the center no longer seems wet.

If you opt to refrigerate it overnight, take it out of the fridge and place it on the counter for about half an hour to take some of the chill off before you bake it.

Cut into wedges and enjoy!

Tuesday, September 21, 2010

Salmon with Artichoke Hearts, Tomatoes and Capers in a White-Wine Butter Sauce


It’s always sad when a great restaurant goes downhill. Some may disagree, but Teller’s (which used to be one of my favorite restaurants in Lawrence, KS) is not as good as it used to be. The décor in the restaurant is unique: it’s built inside an old bank, with some of the old iron bank teller window grates used as decoration, quarters inlaid in the tile floor here and there, and the bathrooms in the old bank vaults with the original vault doors still in place. The food used to be amazing, but it seems like once they took the “Teller’s Mushrooms” (the iconic dish of sausage (or vegetarian) stuffed mushroom caps swimming in a white-wine gruyere cheese sauce, served with little toasts) off the menu, everything else seemed to fail as well. I haven’t had a pleasing dinner there since that disastrous menu change.

One thing Teller’s was always known for though, was it’s seafood. I remember one of my visits I ordered the red snapper, which I’d never had before, and it came with the most amazing sauce. I’ve created my own version of what I had that night at Teller’s, and to me it tastes just as good. Feel free to make this with any sort of fish, however I might caution that it would be a more successful dish if you use a moderately firm-fleshed saltwater fish instead of a soft, flakey freshwater variety. I’d suggest salmon, red snapper, mahi mahi, swordfish, maybe even a nice cod or Chilean sea bass.

*bonus suggestion: avoid “steak” cuts, or cross-sections of fish. They’re full of bones and a pain in the neck to cook. Go with a fillet, and try to get one that’s an even thickness all the way across so it cooks evenly.

**bonus bonus suggestion: I’ve yet to try this, but I bet this sauce would be fantastic to steam some mussels in.

Salmon with Artichoke Hearts, Tomatoes and Capers in a White-Wine Butter Sauce

2-4 fillets of salmon (depending how many you are serving)
1 Tbsp + 1 tsp olive oil
1-2 Tbsp butter
1 clove garlic, minced
2 large canned artichoke hearts (not the pickled ones), squeezed of excess liquid and chopped
1 large or 2 small Roma tomatoes, seeds removed, chopped
1 Tbsp. small capers, drained
juice of 1/3 a lemon
1 c. dry white wine

Heat a skillet over medium high heat. Rinse your fish fillets, pat dry with a paper towel, and season with salt and pepper. Add 1 Tbsp. of olive oil when the skillet is hot. Once you see the very first wisp of smoke rise from the pan, place your fish into the pan presentation-side (whatever side you want to be the top of your fish fillet) down into the pan. Cooking fish is a tricky business. I can tell you it probably won’t take more than 2 minutes per side, but it may be less. The easiest way to tell is to watch the color of the fish’s flesh on the sides of the fillet. When you see the color change from darker to a lighter pink and start to look opaque 1/3 of the way through the fillet, flip your fish. If your two fillets are different thicknesses, you may have to flip them at different times, so just watch for it. After flipping watch the side of the fillet again. When the color change reaches the 1/3 of the way through the fillet mark on the 2nd side, remove the fillet and place it on a plate, presentation side up. Remove the pan from heat for a couple minutes to allow to cool a bit, and reduce the heat to medium. Place the pan back on the heat, and without cleaning it out, add in 1tsp of olive oil and 1Tbsp. butter. (If your butter instantly begins to brown your pan is still too hot, you’ll have to dump it out, wipe it out with paper towels, and start over. Try to avoid this, as wiping out your pan will remove a lot of the flavor for the sauce) Add in the clove of minced garlic and sauté for about 1 minute. Add the chopped artichoke hearts, chopped roma tomato, and capers, and sauté for another minute. Pour in the white wine, squeeze in the lemon juice, and add 1 more Tbsp. of butter, gently whisking in with a fork until it emulsifies (mixes) into the sauce. Simmer until you have the amount of sauce you want for your fish. If you seem to have less than you want, feel free to glug in a bit more wine. Place the fish fillets back into the pan and nestle them down into the sauce. Remove from heat and serve.

I serve the fish topped with the veggie mixture and pour the sauce over the whole thing. I wouldn’t suggest serving this with rice as the flavors in my opinion are decidedly more Italian than Asian, but perhaps a nice side of pasta dressed with garlic, olive oil and parmesan would go well. I served it with some nice green veggies and a chunk of crusty bread for sopping up the remaining sauce.

Thursday, September 16, 2010

Homemade Sloppy Joes and Quick and Easy Potato Wedges

Homemade Sloppy Joes and Quick and Easy Potato Wedges


I've never eaten Manwich, and I'd never heard of maid-rites before I moved to Kansas City. Growing up we always had sloppy joes made from scratch, so honestly I don't have much to compare this recipe to. Thankfully it doesn't need comparison, as it's delicious the way it is. I don't know where it came from, but I got it from my mom. The best part: it uses practically all ingredients that any well-stocked American kitchen probably already has! It's quick and easy for a weeknight, and paired with some homemade potato wedges and a scoop of store-bought coleslaw (yes we took the easy route, but seriously, who wants to make coleslaw on a weeknight?), this makes a quick and easy weeknight dinner!

I'm not the biggest fan of ketchup. To be honest, I rarely eat the stuff. I'm more of a mustard or mayo girl... but there are some things the sugar content in ketchup is necessary for: nice sticky homemade bbq sauces, caramelized tomatoey topping on meatloaf, and shiny slightly sweet homemade sloppy joes. If it makes you feel better, look for a nice organic ketchup. You can try to substitute tomato sauce for the ketchup if you like... I've never tried it like that though, and it may come out tasting different. I'd probably add a touch of sugar and a tad extra salt if you do that.

I'm including a bonus recipe: Quick and Easy Homemade Potato Wedges. These are tasty alongside the sloppy joes, or as a side dish for any number of sandwiches or other entrees.

Homemade Sloppy Joes

Ingredients:

1lb hamburger
1/2 c. chopped onion (I use a little more and just chop half an onion)
1/2 c. water
1/2 c. ketchup
1 tsp. prepared yellow mustard (the kind people put on hamburgers and hotdogs)
1/2 tsp. chili powder
1 tsp. salt
1/4 tsp. pepper

Directions:

Brown the hamburger in a skillet. Drain the grease, return to the skillet, and add the chopped onions. Continue to cook until the onions just begin to soften. Add the rest of the ingredients, and simmer until heated through and liquid has reduced to a sloppy joe consistency (this should only take a couple minutes).

Serve on soft buns.

Makes at least 8 small sloppy joes.

*tip: if you're making this for dinner, and dinner is running late: you can always let this sit on the stove over low heat and add a little water so it doesn't dry out. It will hold until you're ready for it.

Quick and Easy Potato Wedges:

Ingredients:

One large (or two small) red potatoes per person
vegetable or canola oil
Old Bay Seasoning
Jalapeno Seasoning (can omit this or substitute a little cayenne for extra kick)

Directions:

Preheat oven to 400 degrees.

Wash potatoes and poke each several times with a fork. Place on a microwave-safe plate and microwave, uncovered, approximately 7 minutes, or until potatoes have just barely begun to soften (Alternatively you can place the potatoes whole into a pot of boiling water and boil them for 7-10 minutes for the same effect).

Allow potatoes to cool slightly so you can handle them, then carefully cut each potato in half, and each half into wedges approximately 1/2 - 3/4 inch thick. Place wedges into a large bowl, drizzle with oil, and toss to coat. Sprinkle on a liberal amount of Old Bay seasoning, and Jalapeno Seasoning if using.

Spread potato wedges on a baking stone or a parchment paper lined baking sheet. Bake at 400 degrees for 15-20 minutes or until somewhat browned on the outside, turning each wedge over halfway through cooking for even browning.

Wednesday, September 15, 2010

Chocolate Banana "Mousse"

Lucky you, it's a 2 for 1 special today!

Tofu Use #2: Chocolate Banana "Mousse!"


Tofu as dessert?! Am I crazy? No! Well, maybe! Ok yes, I'll admit I'm a little crazy... but trust me it's delicious, and I've fed it to many people and nobody's ever suspected there was tofu in it. Even if you're too scared to taste it yourself, you can make it quick for your kids as an after school snack, and they'll think you're the coolest parent ever (tricking kids into eating healthy food is fun haha).

Not to mention it's the easiest, healthiest, sweet chocolate dessert you'll probably ever taste.


This dessert has 4 ingredients and takes all of 2 minutes to prepare... not counting chilling time in the fridge.

Give it a try... you've got nothing to lose. It's relatively inexpensive to make, and if you don't like it... toss it out, and used the rest of the vinegar in salad dressings and munch down on the chocolate chips!

Use whatever type of chocolate chips you prefer. If you like dark chocolate, go with dark or semi-sweet chocolate. If you're cooking for someone who doesn't like dark chocolate like I have to (hehe), use milk chocolate. If you have a few different chocolate chips leftover in the fridge, use a mixture of a few of whatever you have... it doesn't matter, it's all delicious!

In terms of bananas... the riper the sweeter, the sweeter the better. Bananas with a lot of brown on the peel are not too ripe, they're perfect, especially for baking or this recipe!

For the raspberry vinegar... make sure to get a good raspberry vinegar, not a raspberry wine vinegar. Spend a few extra dollars to get a good one, you can use it for more than just this dessert! A good raspberry vinegar with some oil and a little salt and pepper to taste makes a fantastic vinaigrette dressing or marinade!

Chocolate Banana "Mousse"

1 block firm or extra firm silken tofu (depending how firm or soft you like your "mousse")
1 ripe banana
1/2c. melted chocolate chips
a small dribble of raspberry vinegar

Rinse the block of silken tofu with water and apply a little pressure with paper towels to dry it off a little. Toss the tofu and the peeled banana (broken in half) into the blender. Dribble in a tiny bit of raspberry vinegar and blend while you microwave the chocolate chips for 30 seconds at a time, stirring after each shot in the microwave, until melted and smooth.

Stop the blender and scrape down the sides with a spatula, as bits of banana and tofu tend to stick to the sides, and you don't really want a chunk of tofu in your mouth while eating dessert. Turn the blender back on, and while in motion, dribble in the melted chocolate. Let it blend another minute or two until smooth and light. Taste and add a tiny bit more raspberry vinegar if you think it needs it.

Pour into dessert glasses, custard cups, or double shot glasses. If you'd like to dress it up a bit, feel free to grate a bit of white chocolate on top, toss a few chocolate chips on top, or sprinkle on a few chopped toasted walnuts. (Personally I think just a few grains of a nice coarse sea salt might be nice right before serving!)

Refrigerate for at least 30 minutes or until dinner is done and it's nice and cool.

Marinated Tofu Sandwiches

A day late, but as promised... Tofu Use #1: Marinated Tofu Sandwiches.


First of all: don't be scared. Tofu isn't all that strange, and it can be delicious when flavored well. If you really are apprehensive about tofu, go to a good Asian restaurant and order it there first, to experience it cooked well, and see if you like it. Trust me... you will! Tofu is an excellent and very healthy source of protein, and is extremely underrated!

Marinated Tofu Sandwiches:

1 block tofu (not silken, just normal, regular tofu that comes in a tub with a peel-off plastic top, usually located in your produce section near the bagged salad mixes)
1/2 c. soy sauce (use low sodium if you like)
1/4 to 1/2 Tsp. crushed red pepper flakes (depending how much spice you can take)
1/2 Tsp. garlic powder
1/2 Tsp. onion powder
1/2 tsp. ginger powder
1 Tbsp. oil
8 slices whole-grain bread, toasted
1 ripe red tomato
4 leaves green-leaf lettuce
alfalfa sprouts
garlic mayo
4 slices provolone cheese


Tofu has a lot of water in it, so slice the tofu lengthwise into 4 sandwich-sized slices, and stack each between two layers of paper towels on a plate. Place another plate on top and weigh it down with something (I used the doggie cookie jar). Let the paper towels absorb water from the tofu for at least 30 minutes, then remove from the paper towels and discard the towels.


In a small bowl, combine the soy sauce, red pepper flakes, garlic powder, onion powder, and ginger powder. Carefully place the tofu slices into a shallow dish and pour the marinade over the slices. Turn the slices over, and allow to sit at room temperature for about 10 minutes. Turn the slices over again, and again allow to sit for 10 minutes.


Meanwhile, heat 1 Tbsp of oil in a skillet over medium-high heat. Remove the tofu slices from the marinade and place on paper towels briefly to absorb excess marinade from each side. Place the slices of tofu into the skillet and sear until browned on each side. Be sure you turn the tofu gently, as it is fairly fragile.


I like to make these sandwiches with two slices of toasted whole-grain bread, a little garlic mayo, 1 slice of ripe tomato, 1 leaf of green leaf lettuce, a small handful of alfalfa sprouts and a slice of provolone cheese, but feel free to experiment with whatever you think would taste good!

Thursday, September 2, 2010

My Top Chef Rant

I originally posted this as a comment on www.pleasepackyourknivesandgo.com, but I'm gonna post it here as well.

First of all, last night's episode:

I'll start off by saying Anthony Bourdain is awesome, and he seemed like the only real, down-to-earth, non-pretentious judge on last night's show. He also was honest, and wasn't trying to impress anyone like "My friend, The Ripper." (He also wins bonus points for calling himself a "slut for fish sauce.")

I nearly choked when Kevin said he was going to braise a pork belly in 1 hour. I've never even MADE pork belly, and even *I* know that you can't braise one in an hour. What was he thinking?!

I'm personally a little disappointed that Top Chef doesn't actually make the cheftestants do the full challenge anymore. Their dish was supposed to be able to be freeze-dried for consumption in space. Not only did nobody have to freeze-dry their food for the challenge, which I think they should have, but nobody had to prepare the food in a way that would work in one of the foil pouches. Who can stick a big cube of shortrib or a lamb chop on the bone into a foil pouch and suck it through a hole?

Before you say this is unreasonable, think of some of the challenges of past seasons. What about the Bertolli frozen pasta dinner challenge... where they had to not only create a pasta dish, but IQF (Individually Quick Frozen) it, package it, and then cook it in a pan on a hotplate in the grocery store and serve it/sell it to shoppers? Or even in Masters where they had to create a meal, box it up, and then reheat it in microwaves? I see no reason they shouldn't have had to freeze-dry their food, if not personally, then bring in people to freeze dry it for them to see how well it reconstitutes. I'd like to see Tiffany pull off freeze dried halibut, heh.

Oh, and Tom sassing an astronaut? ("I think if NASA can put a man on the moon, they can figure out how to freeze-dry this." [in response to an astronaut saying it would be difficult to freeze-dry the amount of liquid in one of the dishes]) Why bring on experts like astronauts if you're just going to give them the middle finger when they give their expert opinion? You may be Mr. Sandwich, but you don't work for NASA. Zip it.

I'm thoroughly disgusted at this season of Top Chef, and not just because I really liked Tiffany. She deserved to go last night, her food wasn't her best. But that's what's so frustrating... there's no way to know what anyone's best IS, because nobody's been consistent.

You know... I love Top Chef, but this season so far has been a disappointment. I've not been surprised with any of the people they've sent home so far, and it's entirely because not one single chef on this season is talented enough to be consistent. Look at the 5 in this week's episode... I believe every one of them has been in the bottom on past challenges, and been up for elimination. It's impossible to guess who might win or be sent home each episode when one week a chef pulls off a stunningly perfect dish, and the next week they overcook their protein, make doughy gnocchi, use store-bought frozen puff pastry, or oversalt their dish. Basic mistakes.

Any one of the final 6 cheftestants of Top Chef Season 6 could have crushed any one of season 7's cheftestants without even trying.

Tuesday, August 31, 2010

Spicy Sesame Sake Shrimp with Asian Inspired Rice Pilaf


Ah the deep freeze... always an adventure to find what's been buried at the bottom! Tonight I unearthed a half-full bag of frozen shrimp. Yes yes, I know... frozen shrimp... but when you live in the Midwest, frozen seafood is sometimes the best you can get! I have a plethora of Asian-inspired marinade ingredients from a recipe I tried out a while back, so I figured what the heck, let's rescue these shrimp in style!

I suppose you could skewer these and grill them and they'd be delicious, but the shrimp I had on hand were pretty puny, and the idea of threading tiny shrimp onto skewers on a work night just didn't appeal. Lazy way out ftw!

A few words on chilies: pick the kind you like, for the heat level you can tolerate. I used a cayenne because I like a little heat and I had some dried ones from my garden, but you can go with a milder variety if you like, or even go with a Thai Bird's Eye or habanero if you're adventurous! (or leave the chili out altogether if you think the chili sauce is enough heat for you)

If you can't find broccoli slaw, or don't like it, use whatever veggies you want... you could toss in a can of drained chopped water chestnuts, some drained bamboo shoots, green onions, fresh or frozen broccoli, mushrooms, carrots, whatever tickles your fancy.

Spicy Sesame Sake Shrimp with Asian Inspired Rice Pilaf:

Marinade Ingredients:

1/4c. soy sauce (use low sodium if you prefer)
1/4c. sake
1/4c. mirin (can find in the asian food isle at your local grocery)
1 Tbsp. chili sauce (use whatever kind you prefer, I used a spicy ketchup-like one)
1 Tbsp. sesame oil (taste the marinade, if you want more sesame flavor, add 2 Tbsp. instead)
1 dried cayenne pepper, or other dried or fresh chile, broken or sliced into pieces)

Rice Pilaf Ingredients:

1c. uncooked parboiled rice (I used Uncle Ben's)
1-2 handfulls of broccoli-slaw (comes in a plastic bag by the bagged salad)
2c. seafood stock (or just use chicken stock if you don't like/can't find seafood stock)
1/4c. sake
1Tbsp. Asian seasoning blend (I used Emeril's, but there are several out there)
1Tbsp. oil
salt and pepper to taste

1/2 bag of frozen shrimp, thawed, deveined and peeled, tails left on or off is your choice.
dribble of oil for the pan

Mix all the marinade ingredients together in a bowl, and place into a shallow dish with the shrimp. Cover and refrigerate for at least 2 hours... for a lot more flavor you can marinate overnight, but I left the shells on when I did this and took them off before cooking.

Place all the rice pilaf ingredients in either a pan or a microwave rice cooker, and cook according to the package directions for 4 servings of parboiled rice.

Remove the shrimp from the marinade and pat dry with paper towels. Heat a dribble of oil in a pan on medium-high heat, and saute the shrimp until just opaque and pink.

Serve shrimp over the rice pilaf, perhaps with a nice side of steamed asparagus or broccoli.

Saturday, August 7, 2010

Bing Cherry Ginger and Cinnamon Ice Cream

Remember making homemade ice cream as a kid? That old contraption with the wooden bucket... the rock salt on the ice... sitting on the sidewalk and turning the crank for 30 minutes... opening the lid to scoop out the ice cream, and dripping the rock-salty water into it accidentally... it still tasted so good!

Nowadays there are several new, easier types of ice cream makers. At our house, we recently acquired the ice cream maker attachment for our Kitchenaid mixer, and it's inspired me to try out some new flavors! If we could eat the ice cream quicker I'd come up with a new recipe every week, but so far it's about once every two weeks lol. The first ice cream recipe I tried was the cinnamon ice cream recipe on www.simplyrecipes.com. Toss some halved and pitted fresh plums and peaches in a big foil packet, dot them with a tiny bit of butter, sprinkle with brown sugar and cinnamon and ginger, wrap them up and grill them for 15 minutes and you've got an amazing dessert, made even better by the addition of this delicious cinnamon ice cream!

This inspired me to make my own ice cream concoction... hopefully the first of many! I hope you like it, tell me what you think!

Bing Cherry Ginger and Cinnamon Ice Cream

Ingredients

1 lb. fresh bing cherries, stemmed, pitted and halved
1 Tbsp. peeled fresh ginger, grated
1/2 teaspoons of ground cinnamon

1 cup of whole milk
1/2 cup of sugar + 3/4c. sugar
1/2 teaspoon of salt
2 cups of heavy cream
6 egg yolks

Directions

Place the cherries, cinnamon, ginger, and 1/2 cup of the sugar into a saucepan. Bring to a simmer over medium high heat, and continue to cook for 8-10 minutes. (You may want to add a tiny bit of water at the beginning of the cooking process so the sugar doesn't burn). Cool slightly, transfer to a bowl, and refrigerate until cold.

Meanwhile, heat the milk, 3/4 cup sugar, salt and 1 cup of the cream in another medium saucepan over medium heat. While the mixture is warming, set a metal bowl into a larger bowl half full of ice and water. Pour the remaining cup of cream into the chilling bowl and place a strainer on top.

In another bowl, whisk the egg yolks and then slowly add the warmed milk mixture to the egg yolks one ladlefull at a time, all the while whisking the egg yolks, until about half the heated milk mixture is incorporated. Pour the rest of the heated mixture out of the pan into the eggs, then transfer everything back into the pan. Heat the yolk and milk mixture in the saucepan stirring constantly and scraping the sides and bottom of the pan, until it thickens to a custard consistency. You will know you have reached this stage when the mixture coats the back of a spoon and you can run your finger through it and the liquid stays in place, and the mixture reaches 170-175 degrees F.

Pour the heated custard through the strainer into the chilling bowl of cream to strain out any eggy bits that might remain, remove the strainer and whisk the mixture to combine. Stir occasionally until the mixture chills somewhat, then refrigerate until completely cold, at least an hour. When both the cherry mixture and the custard mixture are chilled, strain the juice from the cherries into the custard mix and stir to combine, reserving the cherries in a separate bowl. Freeze the custard/cherry juice mixture according to your ice cream maker's manufacturer's instructions. Once frozen, stir in the cherries. Transfer ice cream to a sealed container, freeze and enjoy!

Sunday, August 1, 2010

Let's Talk Cookbooks...

Cookbooks... probably one of my favorite types of literature. I've been known to buy a new cookbook and read it from cover to cover like any other book. I've got enough cookbooks to take up at least 1.5 bookshelves on a book case, and I'm slowly adding to my collection. Here's a condensed list of some of my favorites

Cookbooks I consider "required" for any kitchen, good for basic references:

Better Homes and Gardens New Cookbook


If you're not lucky enough to own the original 1968 ring-bound edition, the newest edition is still worth getting!

Betty Crocker's Cookbook


Again, get the old one if you can, otherwise I'm sure the new one is good too... lots of basic recipes and helpful hints.

Cookbooks I use all the time:

300 Comfort Food Recipes


Recommended to me by a co-worker, and I've found some very nice recpies in here. Apparently she's releasing a new edition in August, 500 Comfort Food Recipes. I've already ordered a copy!

Mexican Everyday


Outstanding authentic Mexican food, and none of the recipes have tons of ingredients or are very complex. Lots of things that are easy to shop for and make on a weeknight (a big plus for me!)

Cookbooks that I think are beautiful and entertaining to read (and occasionally cook out of):

Mexico One Plate at a Time


Great recipes, a tad more involved than I'd choose to cook on a weeknight, primarily weekend cooking.

Fiesta at Rick's: Fabulous Food for Great Times with Friends


Again great recipes, but more involved... probably more appropriate for special occasions or weekends.

Jamie at Home: Cook Your Way to the Good Life


An absolutely beautiful read, gorgeous pictures, great inventive recipes, and the book is broken up into sections by what ingredients are in season... and each section also has a blurb with tips about growing the ingredients in question in your own garden/pots.

The New Moosewood Cookbook


A great vegetarian cookbook with superb recipes that make you not miss the meat... hand-illustrated and hand-lettered, beautiful to look at as well.

The New Enchanted Broccoli Forest


The companion to The Moosewood Cookbook, also hand-illustrated and hand-lettered.


I admit I'm also a bit of a Top Chef fangirl, so I own Top Chef the Cookbook, Top Chef: The Quickfire Cookbook, and How to Cook Like a Top Chef. The photos are gorgeous, the recipes make me drool, and they also contain helpful hints and behind-the-scenes info on the show. :)

I also have found that a lot of my favorite go-to cookbooks are rather unconventional... a free Jello cookbook pamphlet, a small paperback cookbook of nothing but curries... and don't ever overlook fundraiser cookbooks! I have one that my high school marching band sold as a fundraiser and one that my grandmother's church sold as a fundraiser, and I use them all the time... They're sure to be filled with tried and true family recipes!


Also keep an eye out for vendors at farmer's markets, county fairs, and local farms who sell their own cookbooks. These people know what they're doing! I have an asparagus and rhubarb cookbook from Pendleton's Country Market that's awesome!


What are some of your favorite cookbooks?